")


")

You’ve proudly hit “Publish” on your Showit website, ready to show it off to the world. But Google needs to know your website exists if you want to start attracting organic leads.
And Google doesn’t know your website exists until you submit your Showit sitemap to Google Search Console. Once you have, Google can start indexing your pages.
Let me de-jargon that for you quickly: “Indexing” is just a fancy way of saying “ranking.”
And you want to rank. You need to rank.
Submitting your Showit sitemap to Google Search Console is like tapping Google on the shoulder and telling it to start paying attention to you.
Today, I’m walking you through what is a sitemap, why you need one, where to find yours, and how to submit your Showit sitemap Google Search Console.
If you already have your Showit sitemap handy, skip ahead to what you need here.
Click a heading below to jump to the section you need, or keep reading:
- How to submit your Showit sitemap to Google Search Console
- How often you should submit your sitemap to Google Search Console
What is a sitemap?
A sitemap is an outline of the pages on a website.
In tech-speak, this is called an “xml sitemap,” but we’ll stick with “sitemap” here.
Your Showit sitemap lists every page of your Showit website that you want Google to know about and rank (including the ones that aren’t linked in your main navigation).
Why do I need a sitemap?
In the simplest terms, you need a sitemap so Google can crawl (aka read) these pages and track your optimization efforts.
Your website includes your main navigation (which typically includes pages like home, about, services, blog, contact), but it probably also has pages that aren’t linked in your main navigation, like a resources page, specific service pages, a pricing page, blog posts, a newsletter page, freebie opt-in pages, etc.
Even though these unlinked pages aren’t in your main navigation, there’s still an opportunity for them to rank on Google… But only if Google knows about them.
When you submit your Showit sitemap to Google Search Console, you’re giving Google an outline of every page that exists within your website, so Google can start indexing your content (aka listing your content in its search results).
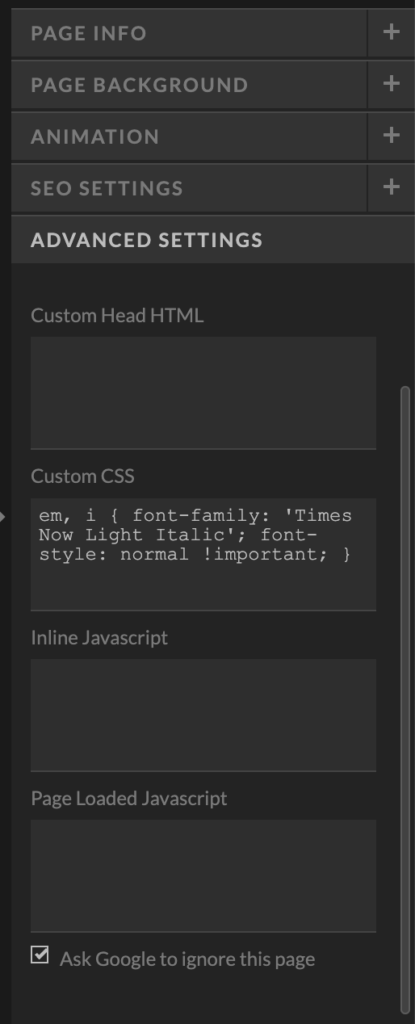
If you don’t want a page to be discoverable (like private pages for onboarding clients, 404 error pages, or legal policy pages) you’ll need to ask Google not to track those pages. It’s fast and simple—here’s how:
In the backend of your Showit website, click on the page you don’t want Google to track, select the “Advanced Settings” tab on the right-hand side menu, and scroll to the bottom to select the checkbox that says “Ask Google to ignore this page.” (Photo below for reference.)
How do I know if my content is indexed yet or not?
Easily. All you need to do is open up Google and search: “site:[yourdomain]”.
Using Showit as an example, I’d type “site:showit.com” into Google.
You can see Showit has 1,930 pages indexed:
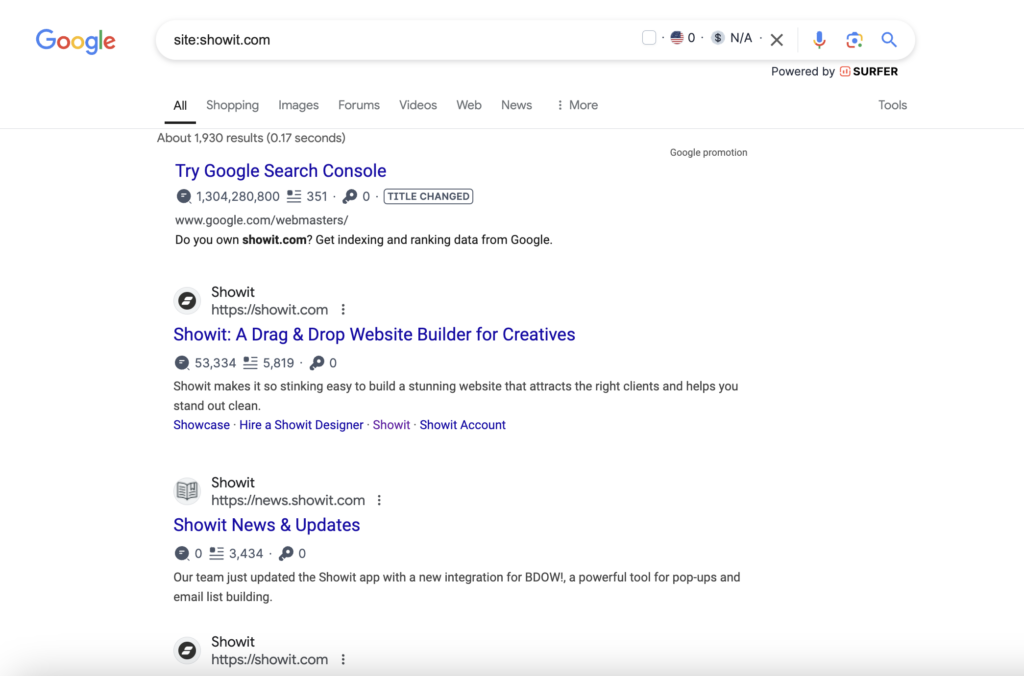
If you search your domain and your pages aren’t showing up, your content isn’t indexed.
How do I find my Showit sitemap?
Your Showit sitemap will follow this formula: https://yourdomain/siteinfo.xml
But if you also have a blog on your Showit website, you’ll need to submit a second sitemap. The Showit blog sitemap will follow this formula: https://yourdomain/sitemap_index.xml
Just type these formulas with your domain into tabs of your browser and keep them handy while you move to the next step.
Now, it’s time to submit your Showit sitemaps to Google Search Console.
How do I submit my Showit sitemap to Google Search Console?
Before you submit your Showit sitemap to Google Search Console, you should know what it is.
Google Search Console is a free analytics tool that helps you figure out what keywords Google associates with your website. You can also use it to find errors that you need to fix, and submit new content to be indexed (aka ranked) by Google.
Remember, “index” is just a fancy way of saying that Google knows it exists.
So after your Showit website is published, the very. first. thing. you need to do is submit your Showit sitemap to Google Search Console. But it doesn’t connect via your Showit settings like your Google Analytics. You need to set it up step by step. Here’s how:
(You can skip to Step 3 if you’ve already set up your Google Search Console.)
Step 1. Open Google Search Console
Head to http://search.google.com/search-console/welcome to begin using Google Search Console.
Step 2. Verify Site Ownership
Verify site ownership so Google Search Console can start monitoring your data.
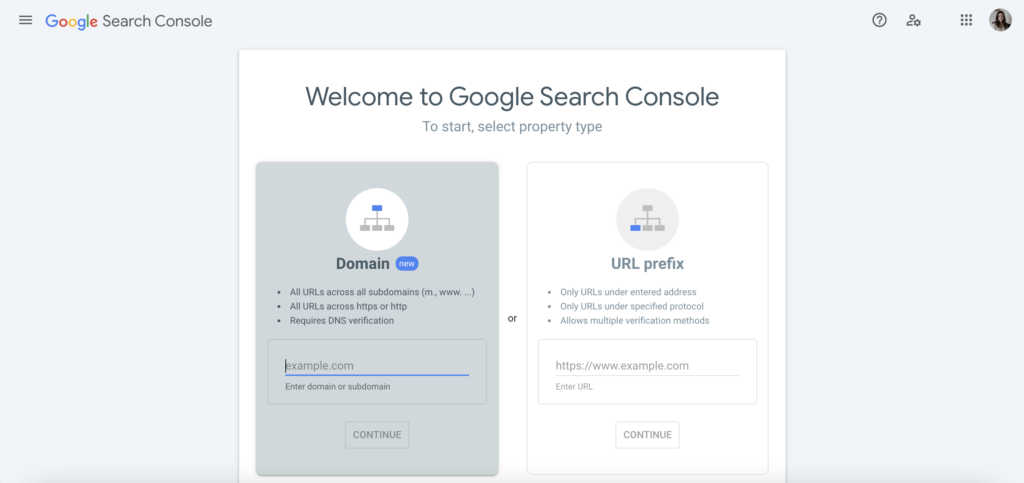
There are two methods to do this:
- “Domain” uses DNS verification & is best for tracking an entire site (plus its subdomains).
- “URL Prefix” is best for tracking a single URL or subdomain.
I recommend using the “Domain” option to keep everything on Google’s radar. This will require a tiny bit of technical expertise as you verify your DNS, but once you’ve done it, you won’t need to do it again.
Step 3. Locate Your Showit Sitemap URL(s)
Open up a browser tab and enter your Showit sitemap URL. It will follow this formula: https://yourdomain/siteinfo.xml
If you have a Showit blog, open another tab and enter your blog sitemap URL. It will follow this formula: https://yourdomain/sitemap_index.xml
Keep these handy until you’re ready for Step 4.
Step 4. Paste Your Showit Sitemap URL(s) Into Google Search Console
Navigate to the “Sitemaps” tab on the left-hand side menu of Google Search Console.
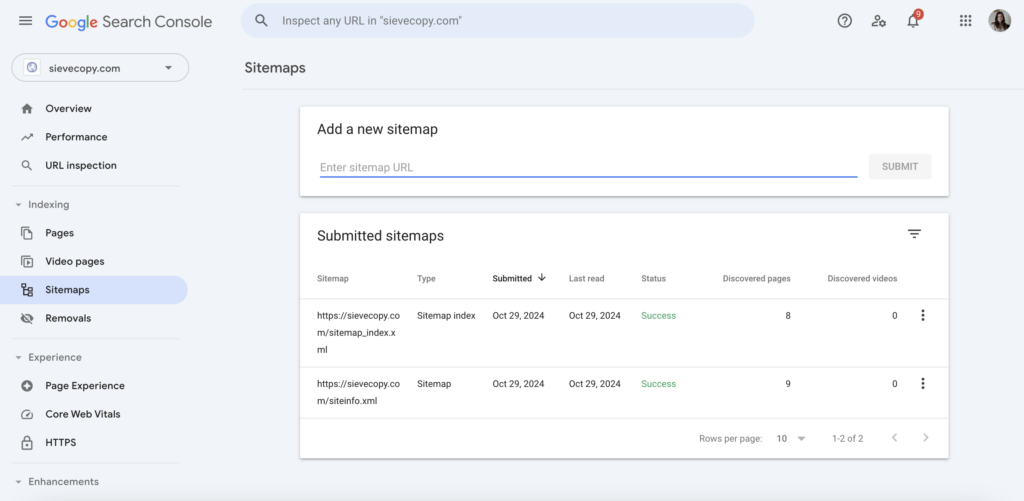
Paste your Showit sitemap URLs (one at a time, if you have two) where it says “Add a new sitemap” and click “Submit.”
If a “Success” message doesn’t pop up straight away, refresh the tab or check back shortly. Sometimes it takes a few minutes.
How often should I submit my Showit sitemap to Google?
Now that you’ve submitted your sitemap, you might be wondering if you ever need to re-submit your Showit sitemap to Google Search Console.
The answer is… maybe.
If you’ve added new pages, removed old ones, or rebranded and relaunched your site, you’ll want to resubmit your sitemap.
If you haven’t updated your content, there’s no need to re-submit your sitemap.
And that’s it! You’ve officially submitted your Showit sitemap to Google Search Console and can start improving your SEO from there.
I hope you found this tutorial helpful and simple. If you want additional support with your Showit SEO, here’s how I can help:
- Browse my Showit SEO services + copywriting packages to work together 1:1.
- Subscribe on YouTube for simple SEO tutorials and live copy audits.
- Head back to the blog for more DIY Showit SEO tips.
+ view the comments